Depth map for laser engraving — free, from any photo
Make a depth map for laser engraving from one photo. Gifsy's free generator runs Depth Anything V2 in this tab and gives you a grayscale PNG where the background is darkest, so LightBurn cuts it deepest and the subject stays raised. 8-bit or 16-bit, no sign-up, and your photo is never uploaded.
Want the photo itself to move in 3D? Try the 3D photo maker
↑ Add a photo to begin.
How to make a depth map for laser engraving
Three steps, and the first two happen in this tab. You end up with a grayscale PNG that LightBurn reads as depth: the darker a pixel, the more passes it gets.
- 1
Add a photo
One clear subject in front of a background. The first time, your browser downloads the depth model (about 50 MB) and keeps it.
- 2
Leave Invert off for a raised subject
The default map is white = near, so LightBurn cuts the background deepest. Turn Invert on only if you want the subject carved in.
- 3
Download and import to LightBurn
Take the 16-bit PNG for LightBurn 2.1 or later, the 8-bit one for older versions. Then set the layer's Image Mode to 3D Sliced (galvo) or Grayscale (CO2).
Which way round: darker engraves deeper
LightBurn's 3D Sliced guide is plain about it: lighter pixels get fewer passes, the darkest get the full number, and pure white gets none. A depth map from this tool puts the nearest thing in the photo in white. So by default the subject is left standing and the background is carved away around it, which is the relief most people want.
Invert off (default)
Subject raised
Background cut deepest.
Invert on
Subject carved in
An intaglio, like a stamp.
LightBurn Negative Image
Same flip as Invert
Use one or the other, not both.
Pure white
Zero passes
Stays at the surface.
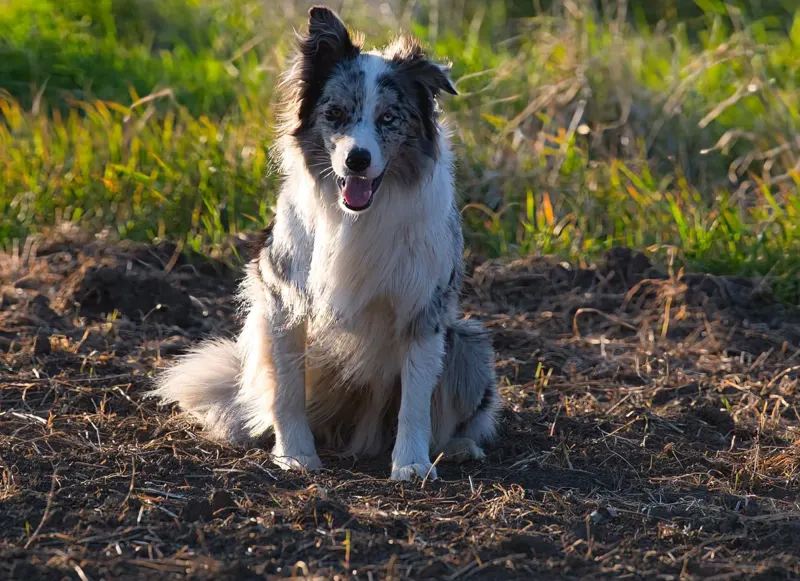
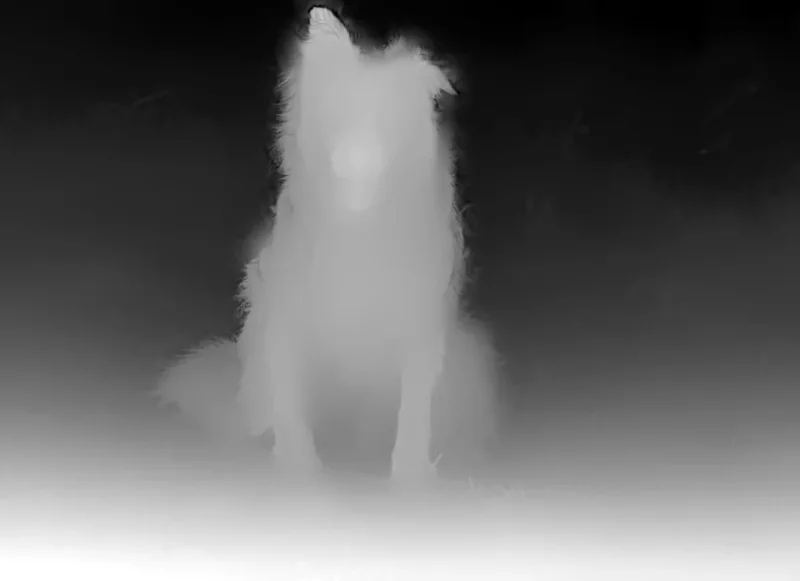
3D Sliced or Grayscale?
It depends on the laser, not on the image. Both modes read the same map, darker meaning more. LightBurn's image mode reference puts it this way.
LightBurn also warns that a large Number of Passes may need less power, so the engrave doesn't go deeper than you meant. Its guide suggests cleanup passes with a tighter Line Interval, higher Frequency and lower Max Power than the main passes, to clear debris and leave a better finish. Test on scrap first.
8-bit or 16-bit for engraving
An 8-bit map has 256 greys, so at most 256 distinct depths. That is plenty for a few dozen passes. Past 256 passes, LightBurn's own guide says a 16-bit image is better, and it reads them from version 2.1. One trap from the same guide: a 24-bit colour image is three 8-bit channels, so LightBurn treats it as 8-bit. Both downloads here are single-channel grayscale, so there's no colour image to trip over. To check what LightBurn actually loaded, select just that image after importing and read its bit depth in the status bar.
Resolution: what the model really sees
Worth being straight about. The model looks at your photo at 518 pixels on the long edge (770 on a machine with 8 GB of memory and 8 cores). The PNG you download matches your photo's size up to 2,048 pixels, but everything above the working size is scaled up. For scale: at a 0.1 mm line interval (254 lines per inch), a piece 100 mm wide takes 1,000 pixels, so the depth is smooth but fine detail is interpolated. Big, simple shapes engrave better than texture.
Photos that engrave well
- Works best
- One subject clearly in front of its background
- Pets, portraits, statues, fruit, toys: rounded shapes
- Even light, and a subject that fills most of the frame
- Big shapes rather than fine texture
- Works worst
- Glass, mirrors and water: the model guesses what's behind them
- Fine hair and fur edges, which blend into the background
- Flat artwork, logos and text: they have no real depth to find
- Very dark or very busy photos with no clear subject
This is depth estimated by AI from a single photo, and it's relative: the nearest point is white and the farthest black, stretched for each photo. It's a good start for a relief, not a measured 3D scan. More on which photos work in best photos for a 3D effect.
Questions
Which way round does LightBurn read a depth map?
Darker is deeper. In 3D Sliced mode the darkest shades get the full number of passes and pure white gets none. This tool's default is white = near, so the background cuts deepest and the subject stays raised. Don't use Invert and LightBurn's Negative Image together: they cancel out.
Does LightBurn read a 16-bit PNG?
Yes, from LightBurn 2.1. LightBurn's guide says a 16-bit map is the better choice if you run more than 256 passes, because it holds more than 256 shades of grey. On an older version, or with fewer passes, the 8-bit file is enough.
Is the 16-bit file really 16-bit?
Yes. It's a single-channel grayscale PNG written from the model's decimal output, not an 8-bit image padded out. A 1200 × 872 map from this tool held 65,508 distinct grey levels when we checked it. The model's own detail is still limited by its working size (518 or 770 pixels), so smoothness comes from the extra levels, not from extra sharpness.
Can I use it on a diode or CO2 laser?
3D Sliced mode is for galvo lasers only. On a CO2 laser, LightBurn's Grayscale mode varies power per pixel and can give variable depth. On a diode, LightBurn says Grayscale gives shading and is harder to get right, so expect a shaded image rather than real relief.
Is it free, and is my photo uploaded?
Free, with no sign-up, no watermark and no limit. The model runs in your browser; the only download is the model itself. Your photo never leaves the tab.
Can it export an STL for a CNC router or 3D printer?
Not yet. It exports a grayscale PNG. Some CNC and relief tools import a height map image directly, so check whether yours takes a PNG before looking for an STL.